Sunday, November 28, 2010
Axle Inventory
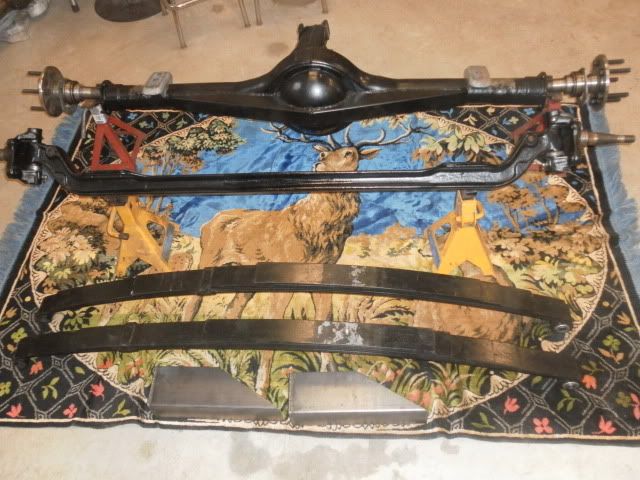
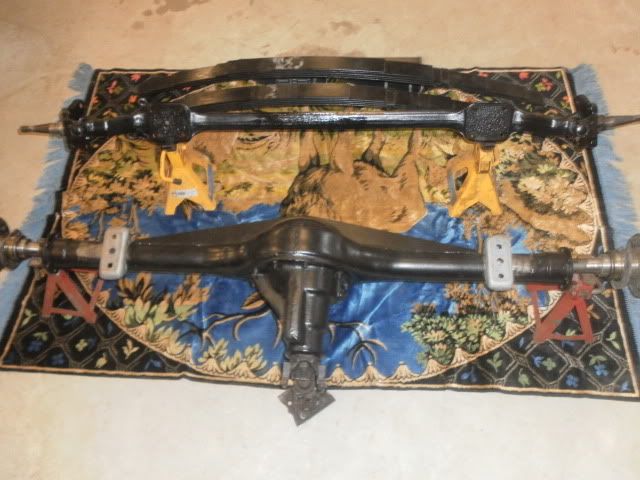
I managed to organize, clean, inspect and Por-15 my axle component for both the front and rear of the car. I still need to dig out my front leaf packs and decide what the optimal stack will be. Our straight axle is in fine shape with tight king pins so nothing but a good wire wheel and paint was required. We welded a back brace from Mancini to our 8 3/4 rear axle housing that should eliminate any kind of flexing. We have our Moser 35 spline axles with Green bearings and have a built up center section with a full spool and 5.38 gears. We also have a set of true super stock springs on loan from our brothers at Wagons of Steel and a leaf spring relocation kit that will allow us to run wider slicks. None of this will be installed until the body is completely roughed together but it's good to have clean, organized parts for when we are ready to tackle it.
Saturday, November 27, 2010
Re-Roof
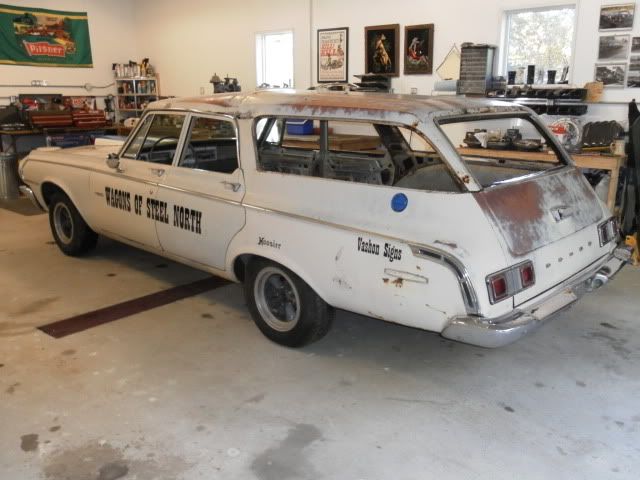
It's not a mutt!! Just because it has four different vehicles poured into one doesn't make it a Heinz-57. Think of it more as a hybrid or a super-car, though those terms may already be used up.
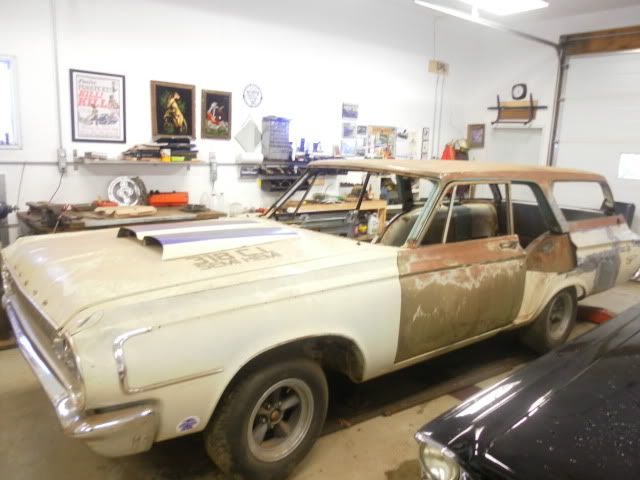
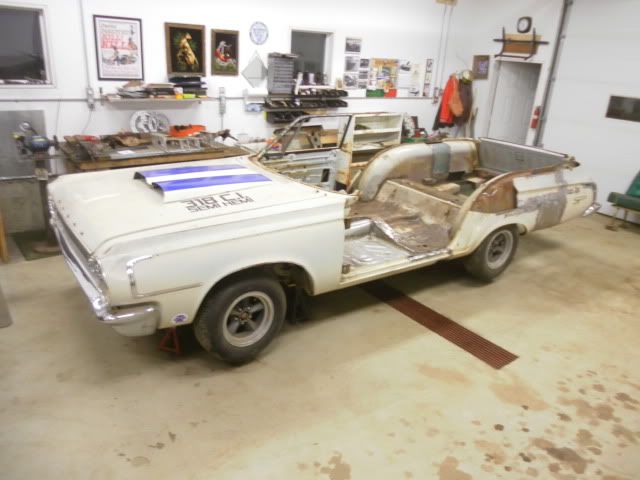
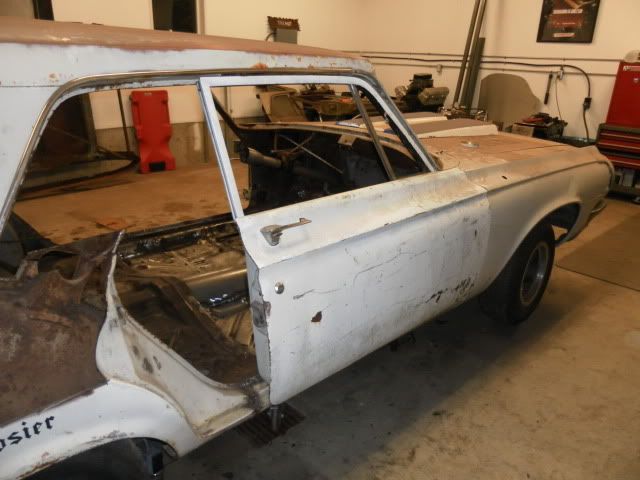
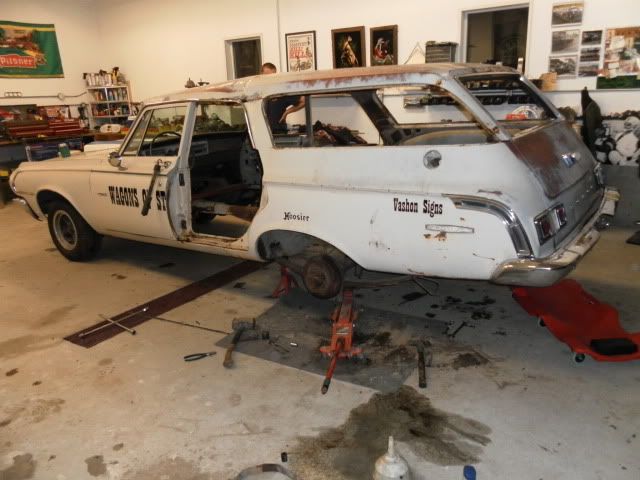
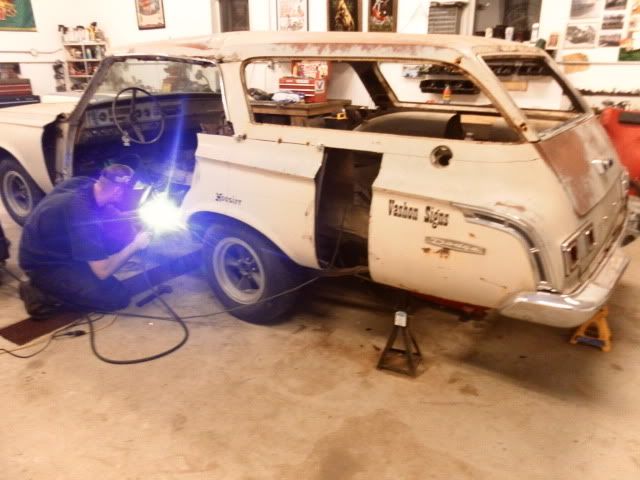
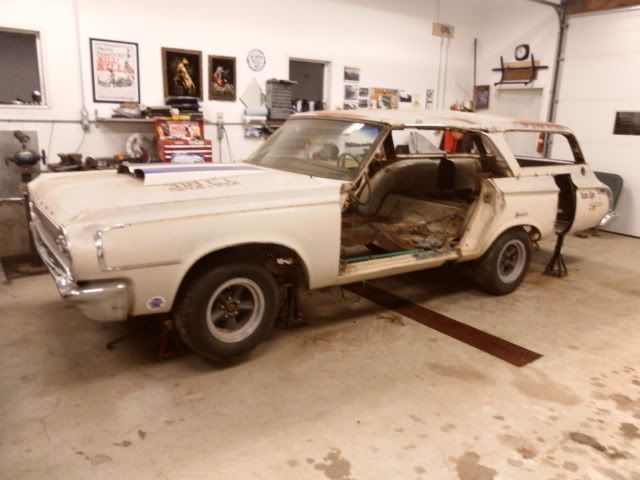
Chris and I slaved last night to get the new (old) roof donated from our '64 Belvedere swapped onto our new platform. The swap went rather well considering the magnitude of the job. We took the time to test fit the windshield once the A-pillars were tacked in place and it fit great. We also took the opportunity of having the roof off to finish welding in the rest our frame extensions. We used 1/8 ga. 2x2 box tubing and formed 16 ga. sheet metal for the extensions which is way more than what the factory used.
I spent a few hours today making sure that everything was straight and stitching the new roof to the body until I ran out of shielding gas. I'll have to finish it up after the weekend. We also hung the driver's side door in anticipation of the next chore which will be simultaneously modifying the upper door frame ('63 door are different) and sectioning in the new B-pillar and rear side window sections.
Thursday, November 25, 2010
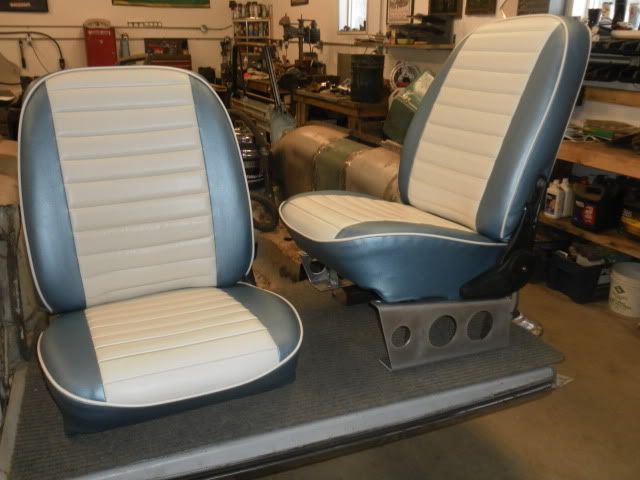
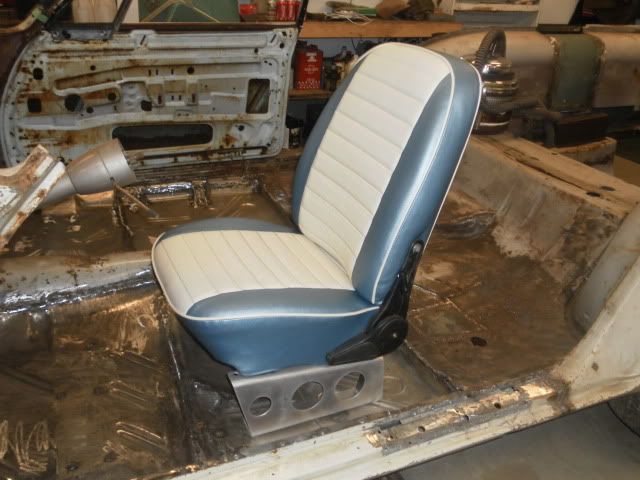
!!!HEMI SEATS!!!
Alright, so I'm sort of putting the cart before the horse here but when it comes to the key ingredients of this tribute build recipe there are certain things that have to happen. Injected or cross-ram hemi (maybe some day); nose high stance with five spoke wheels up front and weird painted steelies out back; obviously the sometimes awkward axle relocation with the straight axle up front (or relocated torsion bars like the factory did) and of course A-100 van seats with the drilled aluminum brackets.
I have to admit that I spent way too much money on the brackets and the production is sort of crap. I'm going to take them to a local fabricator and get him to build me six sets so I can pawn them off to other lunatics like me who are building a similar era cars. I chose the color combo of light metallic blue and off-white from our upholstery shop years ago and decided to go with my gut and stay the course. A wise decision. Wheeler's upholstery did a kick-ass job and even spent the extra time to do tuck and roll in the inserts.
Friday, November 19, 2010
Convertible Wagon?!?
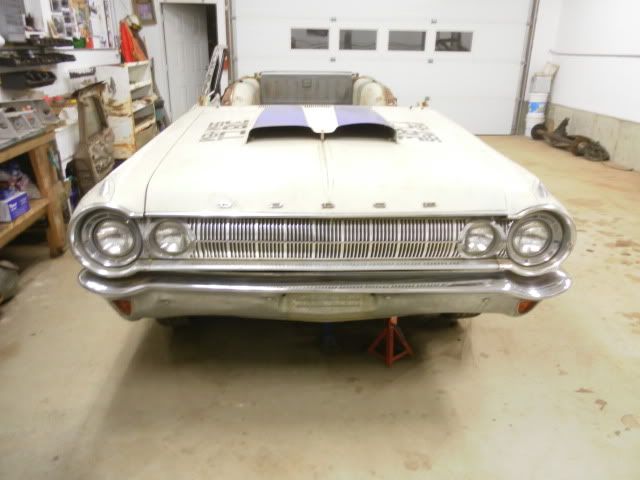
In case there was any doubt whatsoever concerning our level of sanity, have a look at what we've done now. That's right, roof swap. There's no chopping going on here, just a straight up complete roof exchange from our friendly donor '64 Plymouth wagon. This roof is far from amazing but it's pretty much fried gold compared to the one that was on this car.
We also removed the steel dash to access the A-pillars and we test hung the new passenger door to see how it will fit. The body lines look great but since it is from a '63 Plymouth, the angle on the door pillar is wrong so we will have to use the frame sections from our four door doors and graft them onto the new doors. Nothing is easy about this project but I keep telling myself that the outcome will be outstanding...or hilarious. Either one works for me.
Here we see Graham painting some rust converter on the belly of the new roof. It's all quite heavily braced from when we removed it so it should have the right shape when it comes time for installation. I'm thinking that I will paint the inside while it's not in a cramped space over my face.
We also removed the steel dash to access the A-pillars and we test hung the new passenger door to see how it will fit. The body lines look great but since it is from a '63 Plymouth, the angle on the door pillar is wrong so we will have to use the frame sections from our four door doors and graft them onto the new doors. Nothing is easy about this project but I keep telling myself that the outcome will be outstanding...or hilarious. Either one works for me.
Here we see Graham painting some rust converter on the belly of the new roof. It's all quite heavily braced from when we removed it so it should have the right shape when it comes time for installation. I'm thinking that I will paint the inside while it's not in a cramped space over my face.
Saturday, November 13, 2010
Totally Floored
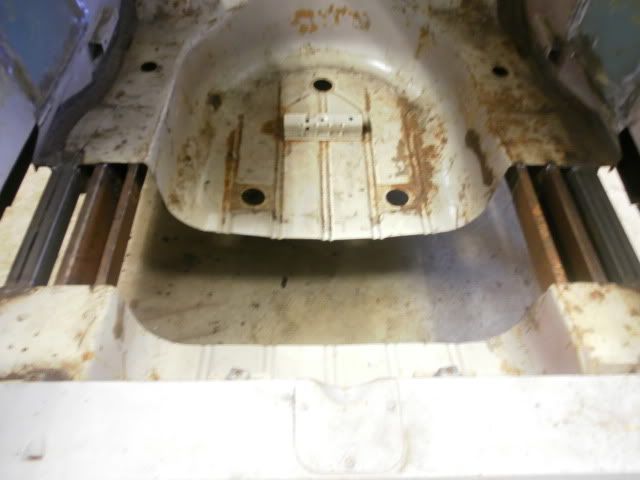
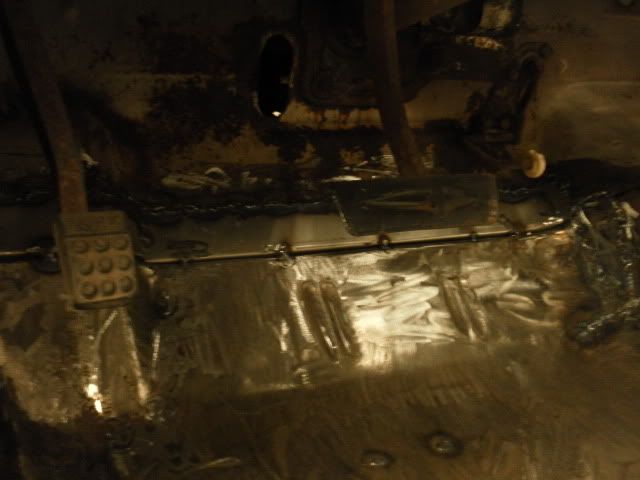
This is my fourth complete floor installation in a '60's Mopar and it never gets any easier. I have to admit that my first two were pretty crappy and were made out of flat sheet metal and probably overlapped lots of old flooring...not good. The last two were done with the correct formed panels which are expensive and require minimal trimming but look right and provide strength and structure. Remember that these cars are all uni-body construction so the floor is actually a structural piece.
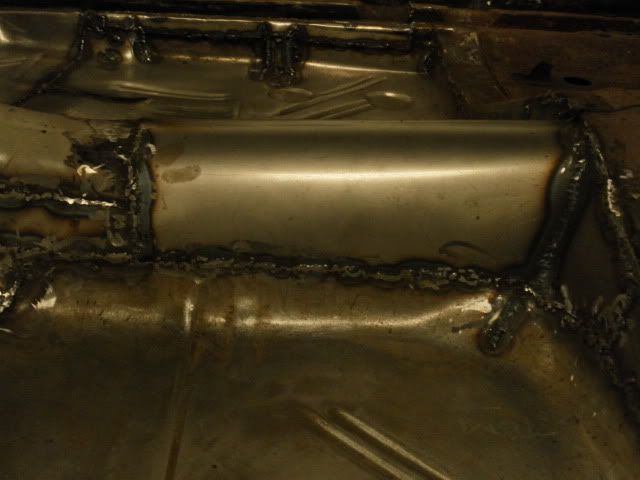
The rear section of the drive shaft tunnel and the pinch weld at the fire wall were also fairly infected with rust so needed to be replaced. I hand shaped the tunnel section and tied it into the floor section and the existing front section of tunnel.
As nice as the replacement floor pans are, they still need a bit of attention. They sit a bit low in the hole whereas the factory ones overlap onto the inner sill plate where they are spot welded in place. Actually, all of the factory pans are spot welded like crazy which makes them really difficult to remove. I attempted to emulate this design by drilling holes where the pan meets the cross member, seat braces and anything solid and tying it in with a red hot rosette weld and a solid hammer smash. I did the same thing all the way around the perimeter with 1"x2" lengths of sheet metal bent into a 90* and drilled every few inches. There is literally not a single mm of seam on this floor that is not bonded with weld.
Once we get the car up on the rotisserie we will tie the sub-frame connectors into the floor. The drive shaft loop will also have bracing going out to the seat mounts. Couple this with an extensive roll bar system (not quite a cage), front and rear bracing between the frame rails and a motor plate and you've got one seriously rigid chassis.
This week I will be focusing on stitching the rear inner and outer panels together then it's almost roof swap time. Back to the cave.
Sunday, November 7, 2010
Down to Business
Alright, up until now it's been all about the back story and posting period photos (without permission) of cars that inspire me and this project. Now it's time to show the work. The first order of events is to completely level the car so we have a completely square (so to speak) canvass to guide us in making straight cuts.
Next up we remove the gas tank since we will be using a fuel cell and don't need the factory molotov cocktail sitting right in the way of where we will be doing lots of cutting and welding. For future reference, it should be noted that you need to drop the rear axle in order to remove the tank through the rear wheel opening. Or you can do it like we did and struggle with pry bars and jacks to try and squeeze it out before giving in and doing it right. Next we removed the doors and drilled out the spot welds for the B-pillar.
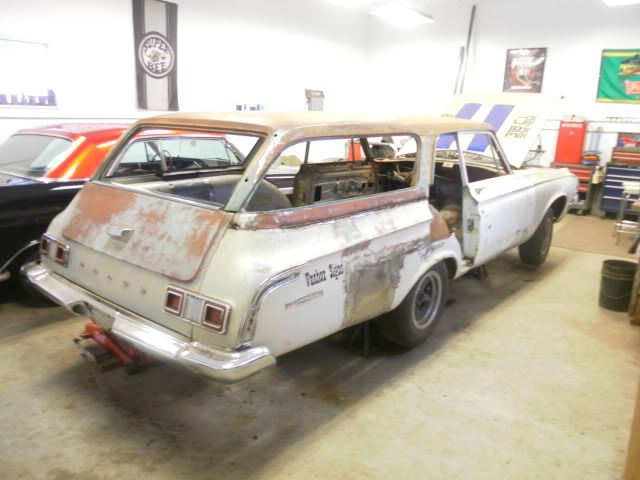
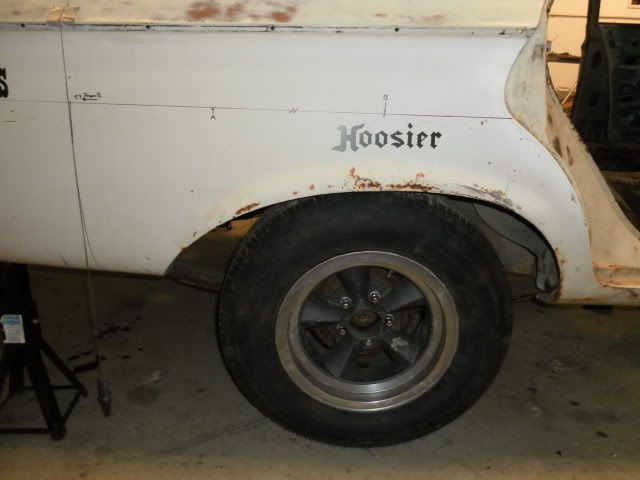
We spent hours planning on how this cut and splice operation would go and even longer making straight and level lines on the car before we even made one cut. The difficulty with altering a wagon compared to a sedan is that the inner wheelhouse runs the entire length of the quarter. The sedan can have the entire wheel house (that is more the shape of a tub) sectioned out and moved as one. This allows a lower cut below the belt line so there's no interference with the compound body lines. Because of our dilemma it was necessary to do a high cut and jog it back on the inside in order to clear the leaf spring perch. Our hours of planning paid off and the sectioning was a success. Stitching everything back together will be a bunch more work but I think the end result will be worth it
.
Next up we remove the gas tank since we will be using a fuel cell and don't need the factory molotov cocktail sitting right in the way of where we will be doing lots of cutting and welding. For future reference, it should be noted that you need to drop the rear axle in order to remove the tank through the rear wheel opening. Or you can do it like we did and struggle with pry bars and jacks to try and squeeze it out before giving in and doing it right. Next we removed the doors and drilled out the spot welds for the B-pillar.
We spent hours planning on how this cut and splice operation would go and even longer making straight and level lines on the car before we even made one cut. The difficulty with altering a wagon compared to a sedan is that the inner wheelhouse runs the entire length of the quarter. The sedan can have the entire wheel house (that is more the shape of a tub) sectioned out and moved as one. This allows a lower cut below the belt line so there's no interference with the compound body lines. Because of our dilemma it was necessary to do a high cut and jog it back on the inside in order to clear the leaf spring perch. Our hours of planning paid off and the sectioning was a success. Stitching everything back together will be a bunch more work but I think the end result will be worth it
.
Thursday, November 4, 2010
The Grand Scheme
So now that almost all of the parts have been sourced and collected for the project and the weather is turning to shit, it's time to make sparks fly and turn this meatloaf into Chateau Briand. The quick and dirty plan goes a little something like this. Chop 12" out of the middle of the car and make a precision cut across the whole rear section (not the roof silly) behind the spring mounts, keeping everything intact and rolling as one unit. Slide said unit forward to mate with the rest of the car. Install new floor pans and sub-frame connectors that will tie into the new floors. Prep the replacement roof from the Belvedere and swap out the old raunchy piece of crap. Brace the frame both front and rear so we can eliminate the inner fenders. Prep A-100 straight axle assembly and install. Test fit dummy block 440 for motor plate brackets. Do lots of body work both inside and out. Re-install windshield. Install 2 door doors and associated B-pillars and rear window surrounds. Make lexan templates from existing glass, preferably in blue. Install fuel cell and all related fuel system components. Rear mount battery with outside shut-off. Freshen up test mule 440 with low rise dual quads and install with new trans. Buy new drive shaft. Get pie crust slicks to install on the new 15x7 steelies that I just scored. Fire up motor and go racing. Did I miss anything? Probably tons but I feel like throwing up now that I look at the list all in one place. Will it be racing next Summer? Anything is possible but it probably won't be in finished paint, that's the last thing on my list (besides the hilborn injected 528) I think I should be able to bang off lots of this list this Winter. Most of it is just time and welding wire, so I just need to forget about having a life and go to town on this MoFo.
Subscribe to:
Posts (Atom)