
This is my fourth complete floor installation in a '60's Mopar and it never gets any easier. I have to admit that my first two were pretty crappy and were made out of flat sheet metal and probably overlapped lots of old flooring...not good. The last two were done with the correct formed panels which are expensive and require minimal trimming but look right and provide strength and structure. Remember that these cars are all uni-body construction so the floor is actually a structural piece.
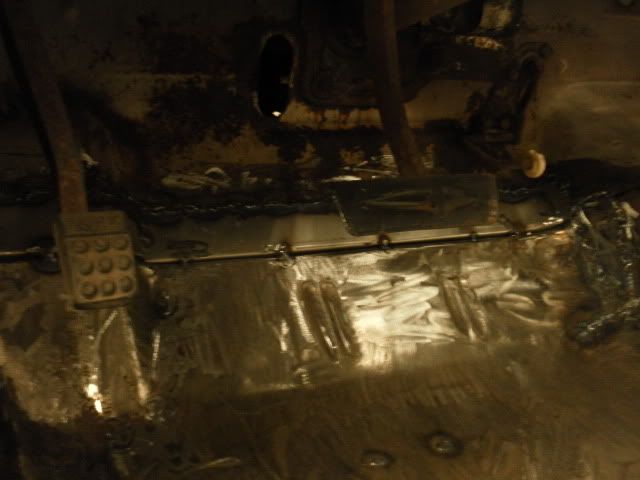
The rear section of the drive shaft tunnel and the pinch weld at the fire wall were also fairly infected with rust so needed to be replaced. I hand shaped the tunnel section and tied it into the floor section and the existing front section of tunnel.
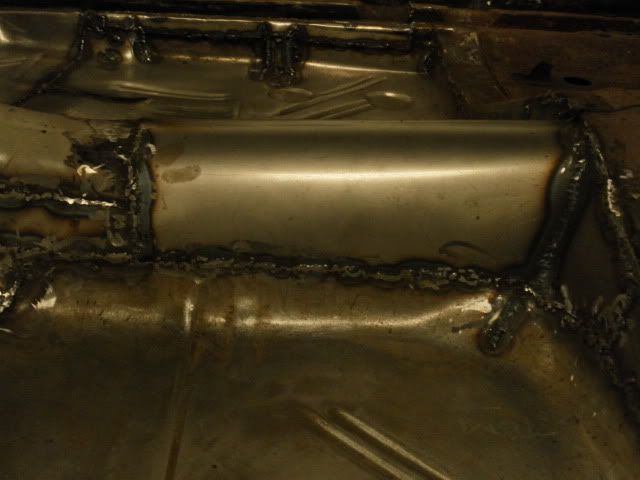
As nice as the replacement floor pans are, they still need a bit of attention. They sit a bit low in the hole whereas the factory ones overlap onto the inner sill plate where they are spot welded in place. Actually, all of the factory pans are spot welded like crazy which makes them really difficult to remove. I attempted to emulate this design by drilling holes where the pan meets the cross member, seat braces and anything solid and tying it in with a red hot rosette weld and a solid hammer smash. I did the same thing all the way around the perimeter with 1"x2" lengths of sheet metal bent into a 90* and drilled every few inches. There is literally not a single mm of seam on this floor that is not bonded with weld.
This week I will be focusing on stitching the rear inner and outer panels together then it's almost roof swap time. Back to the cave.
No comments:
Post a Comment