Tuesday, May 31, 2011

Fun with Fire-up


Especially when it comes to scorching all of Chris' eye brows off. The car sounds like a fried turd in this clip but has since been tuned and tweeked so it flashes with the twist of the key and sounds solid. http://s35.photobucket.com/albums/d166/kittyempire3/Wagon%20Shots%20-%20Graham%20Jones/?action=view&current=alteredstart-up.mp4

Tuesday, May 24, 2011

It's Alive!!

We transplanted El Chupacabra to Chris' shop the other day for the final segment of the build. Here we will do the finishing body work, hang the remaining panels, primer and paint followed by re-assembly. Sounds simple enough when you say it like that but in reality it's another monstrous shift to try to get us to the track as soon as humanly possible.

 Yesterday we finished up some loose end wiring and secured a couple of fuel fountains then fired her up. It was really gratifying to hear it run even though it was through stinky gas. Fire-up went reasonably smooth since this is basically a "broken in" motor with new heads on it. We pretty much hate the under car headers but until we can find time to build some fender wells we'll have to live with it. She even decided to lash out and burn Chris' eye lashes and eye brows with a bellowing back-fire in the form of a fire ball to the face. Don't wake up the baby Dragon!!
Videos to follow.

Sunday, May 1, 2011

In The Hole


Well we managed to finally get our our big block pushbutton 727 transmission from our friend and Wagons of Steel South team driver Mark Maez. Mark is a professional transmission builder out of Tacoma and usually builds strange and exotic transmissions but being a Mopar nut like us, he really knows the ins and outs of our beloved 727s. This is a seriously critical piece to our puzzle and not something that needs to get skimped on. While motors and diffs will inevitably explode and be used to keep boats from floating away, we hope that this unit will last a long time. Not that transmissions don't grenade on a regular basis but it's good to know that this one is starting with beefy new parts and should laugh in the face of our mild black-up mill. Mark also sold us a bitchin' high stall converter that is again designed for a way higher output motor but should work good with our lower HP 440 for starters.You're the man Mark!!!
Now that the "Super-Trans" is in the house we wasted no time mating it to our mule 440 and hanging it from the picker. We also went ahead and bolted our motor plate in place to see where it would line up for some custom brackets. The beefy aluminum motor plate is clearly engineered to accommodate dropping an RB engine into any application of vehicle so there was some pretty aggressive trimming to eliminate the "snow plow" affect.
We considered setting the engine back farther but without considerable fire wall mods we would only gain less than an inch so we opted to go with the factory mounting location...for now. Using some 1/4" angle iron, we welded brackets for the plate on the top of the front frame and bolted the plate to it. There was also some calculating for bolt-ons on the plate itself for things like the alternator and coil which will be fastened directly to plate. Then we hacked it up to fit our needs. It's pretty exiting for us to see a complete power train sitting in it's new home since the humble 318 Poly vacated the premises two years ago. The final outcome looks pretty outstanding I think and really brings a lot of elements together for the project.

 Just over a month remains until the first test & tune at Thunder Mtn. Will we make it? I do my best not to bet against my own horse so I say "Hell Yah!!"


Thursday, April 21, 2011

The Mule

 
We finally got down to business with our first test subject aka "The Black-up". This motor has been in the family for quite some time and has never received the respect that it deserves. It's basically a '77 truck motor that probably expected another year or so of faithful utilitarian duties before getting parked in a field and returning back to the Earth. Nothing could be further from the truth. A bunch of freakazoid gear heads picked it up and decided to stab it into their race car that had a wounded mill. It then got unceremoniously over carbureted and hauled to Spokane raceway where it was hot lapped until the main bearings fell away like cigarette paper. The black-up was then freshened with a forged crank and got stabbed into my Polara tow wagon to haul our 6000# race program to Mission raceway. This journey went swimmingly well for the first 3 1/2 hours before the cam decided to seriously give up the ghost and break into three equal pieces. Pretty much one of the worst engine sounds I have ever heard. Back to the shop to be cleaned out and stored under a bench for several years.

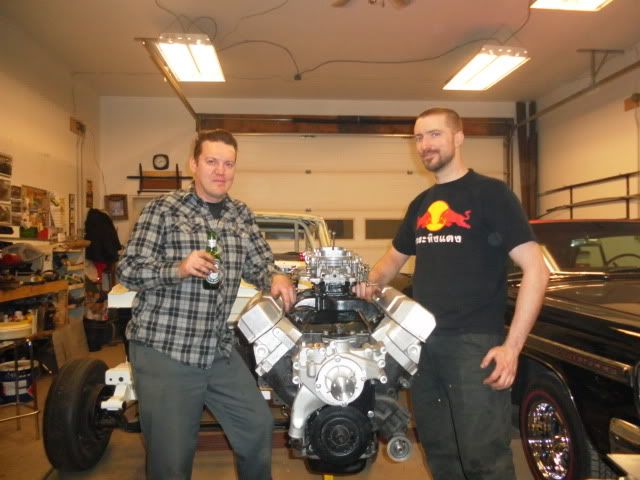
Fast forward to the present day where these same group of hooligans are yet again in need of a big block to flog after spending all of their dough on building some whacked out altered wheelbase wagon. An injected 500+ inch monster will eventually live between her fenders but not this year. So for anyone who has ever built a race engine (or any engine for that matter) you know that cleanliness, preperation and a plan of action are key ingredients to making an internal combustion engine stay in one piece. I spent days getting everything ready and finally last night we put it all together. This will never be a serious horsepower machine at maybe 9:1 compression but we've got some good bolt-ons to scavenge every ounce of power to make this disrespected big block into a descent little (big) mill.


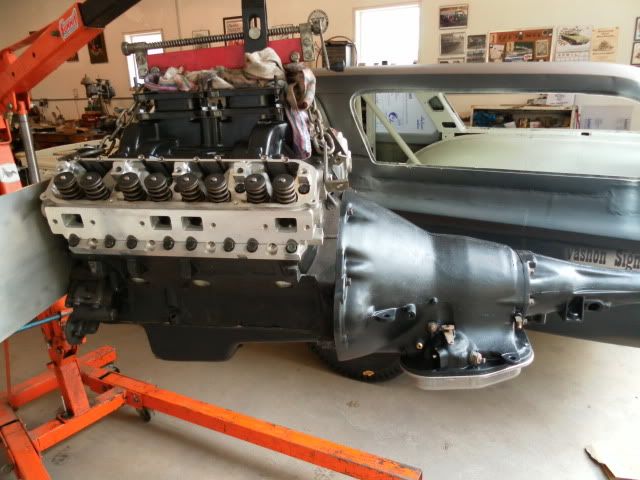
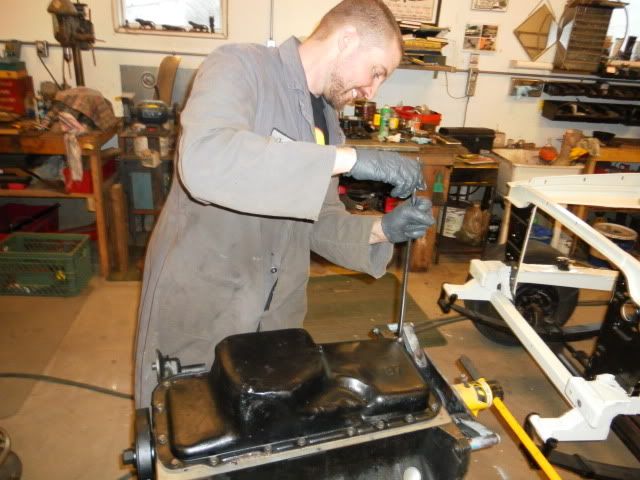
After some basic block prep we were ready to button up the bottom end. We added a crank scraper and a one way oil screen to keep things from getting too frothy down low and we topped (bottomed) it all off with the best stock pan in the collection with a weld-in steel oil baffle. Hello budget.


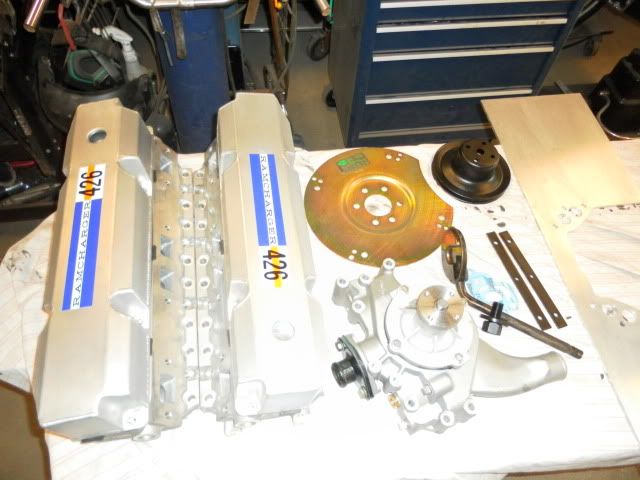
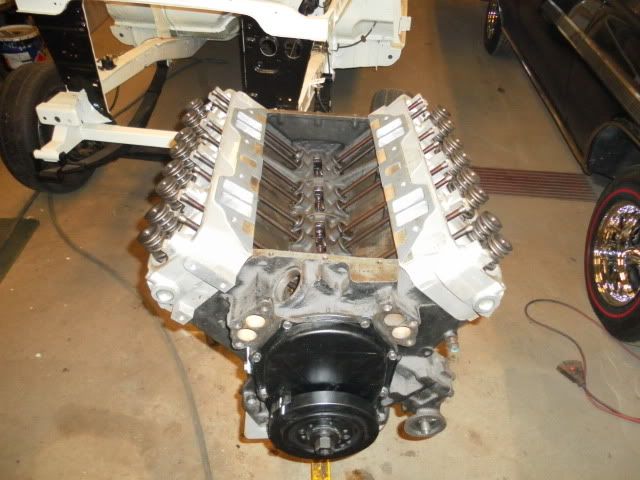
Next we moved onto the top end where we bolted on the mildly massaged 440source aluminum heads. These heads are a closed chamber design so should help out in the low compression department as well as having a nice flow characteristic and weight savings.


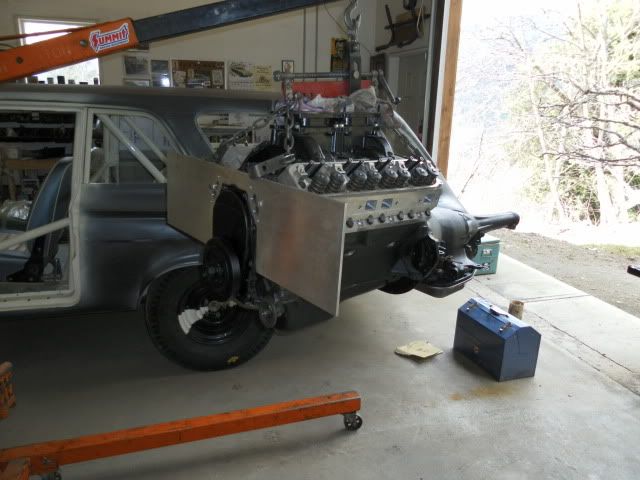
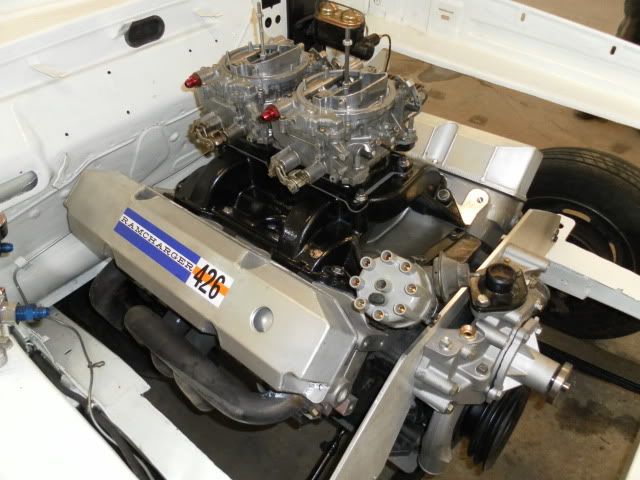
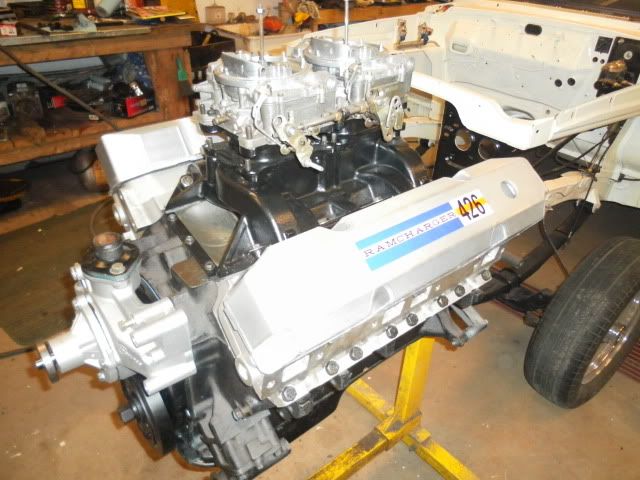
Finally, we topped off the evening by bolting on the low rise dual quad that we will also be testing. It's a dual plane design which is more of a street intake but it also houses two carbs so we'll see how it works out. We'll also be experimenting with a couple of 2" Offy spacers. Failing that we will probably just bring our M1 intake to the track with our old trusty 950 double pumper since an intake swap is only eight bolts.


Over-all a great evening of wrenching and since we were all still pretty wired we took it down to the pub for some live music, pool and libations. Damn, I have a good life.

Tuesday, April 12, 2011

Dashing Good Looks

 
We finally settled on a colour to off-set the Ivory on the body and wanted to showcase some of it in our interior. The dash originally had a pad on it so was full of holes for mounting it, plus there were other holes drilled throughout the top for speakers and the like. I set to work welding up these unwanted vacancies and then set to work laying body filler over the whole thing since it was pocked and marred by surface rust. Once that was looking nice and smooth I layed down some primer and went to work on the steering column, hood scoop and other dash related items giving them the same treatment. Since I ended up brushing on some of the single stage ivory paint in the interior with reasonably descent results I thought I would try this with the blue. Huge mistake!! It turned out looking like crap and I had to sand everything down to smooth again. What a total waste of time and energy. O.K. I'm over it.

Next we sprayed all of the now re-primed and paint ready items out at Chris' shop where we set up a makeshift spray booth. This time the blue went down like it should, showcasing a little micro-flake. Chris then went to work on his tendinitis by colour sanding and laying out some clear over the now smooth blue. It turned out great and today I got it all installed with the retro-fit guage cluster, steering column and current steering wheel plus a few other bolt-ons to make everything look like a real car. We're planning on using the heater panel to house some of our toggle switches and I still need to make a radio delete plate but it's all coming together nicely. I also cleaned and lubed the pushbutton shifter controls and they now operate free and easy with pinky pressure.

Friday, April 1, 2011

Steering Contest

It took some engineering but we now have a fully operational and reasonably adjustable steering system. It is a cross steer system so it will most likely have a similar bump steer to the Dodge van that most of the parts came from but it won't be as bad as doing a near steer set-up. We messed with the toe angles for a while to get them in the ball park but caster has to be corrected via steel shims between the leaf packs and axle pads. This bit of fine tuning will take place on Chris' "space age technology" alignment rack back at Babe's Automotive. We checked out some factory steering box mounts from some of our other wrecks of the same era and decided that the mount that we designed was suitably over-built. The manual steering box came from a factory V8 '65 Valiant that I parted out a few years back. It's a standard ratio box and feels tight and responsive. We even managed to use the Valiant pitman arm in our design. One more necessary piece of the puzzle banged off. So lets see, it steers and stops. What's missing? Oh yah, go power!! That part will be ridiculously exciting and will be happening sooner than later. Or should I say sooner than body work. In case you haven't noticed I really don't care for body work, or dry wall for that matter. The results are rewarding but it's so boring.